
PiSSA Fine-Tuning Tutorial
Warning
The latest version of the RWKV-PEFT repository no longer provides PiSSA
.shscripts. You need to align it manually with 🤗 PEFT.
What is PiSSA Fine-Tuning?
PiSSA Fine-Tuning is a parameter-efficient fine-tuning method (PEFT, Parameter-Efficient Fine-Tuning). PiSSA fine-tuning maintains model performance by selectively updating part of the parameters (such as LoRA or Adapter layers), while avoiding a comprehensive update of the entire model, thus improving training efficiency.
PiSSA has the same architecture as LoRA fine-tuning, but only differs in the way of initializing the Adapter: LoRA initializes the adapter parameters with Gaussian noise and 0 and freezes the core model parameters, while PiSSA directly fine-tunes the low-rank principal components A and B of W and freezes the secondary correction terms.

Therefore, PiSSA converges faster and performs better than LoRA.
The PiSSA fine-tuning method in this article comes from the efficient parameter fine-tuning project RWKV-PEFT in the RWKV community.
Before starting the PiSSA fine-tuning, make sure you have a Linux workspace and an NVIDIA graphics card that supports CUDA.
PiSSA VRAM Reference
The GPU VRAM requirements for RWKV PiSSA fine-tuning can be referred to in the following table:
| Model Parameters | bf16 | int8 | nf4 |
|---|---|---|---|
| RWKV7-0.1B | 2.6GB GPU | 2.4GB GPU | 2.5GB GPU |
| RWKV7-0.4B | 3.4GB GPU | 3GB GPU | 2.7GB GPU |
| RWKV7-1.5B | 5.6GB GPU | 4.6GB GPU | 3.9GB GPU |
| RWKV7-2.9B | 8.8GB GPU | 6.7GB GPU | 5.7GB GPU |
| Model Parameters | bf16 | int8 | nf4 |
|---|---|---|---|
| RWKV6-1.6B | 7.3GB GPU | 5.9GB GPU | 5.4GB GPU |
| RWKV6-3B | 11.8GB GPU | 9.4GB GPU | 8.1GB GPU |
| RWKV6-7B | 23.7GB GPU | 17.3GB GPU | 14.9GB GPU |
The data in the above table is based on the following training parameters:
- ctxlen=1024
- micro_bsz=1
- strategy=deepspeed_stage_1
- pissa_r=32
- svd_niter=4
As the training parameters change, the VRAM required for RWKV PiSSA fine-tuning will also change.
Collect Training Data
You need to collect binidx data that is more suitable for training RWKV. For specific methods, you can refer to Preparing the Training Dataset.
Configure the Training Environment
To train the RWKV model, you first need to configure the training environment such as conda. For the specific process, please refer to the RWKV Training Environment Configuration section.
Clone the Repository and Install Dependencies
In Linux or WSL, use the git command to clone the RWKV-PEFT repository:
git clone https://github.com/JL-er/RWKV-PEFT.git
After the cloning is completed, use the cd RWKV-PEFT command to enter the RWKV-PEFT directory. And run the following command to install the dependencies required by the project:
pip install -r requirements.txt
Modify the Training Parameters
Open the run_pissa.sh file in the RWKV-PEFT/scripts directory using any text editor (such as vscode), and you can modify the training parameters to control the fine-tuning training process and training effect:

The following is a parameter adjustment process for PiSSA fine-tuning:
Appendix: Configuration Reference for run_pissa.sh
load_model='/home/rwkv/RWKV-PEFT/model/RWKV-x070-World-0.4B-v2.9-20250107-ctx4096.pth'
proj_dir='/home/rwkv/RWKV-PEFT/output-manjuan/pissa'
data_file='/home/rwkv/RWKV-PEFT/data/test-1'

n_layer=24
n_embd=1024

micro_bsz=8
epoch_save=1
epoch_steps=1000
ctx_len=512

pissa_config='{"pissa_load":"","pissa_init":"","pissa_r":32,"svd_niter":4}'


python train.py --load_model $load_model \
--proj_dir $proj_dir --data_file $data_file \
--vocab_size 65536 \
--n_layer $n_layer --n_embd $n_embd \
--data_type binidx --dataload pad --loss_mask pad \
--ctx_len $ctx_len --micro_bsz $micro_bsz \
--epoch_steps $epoch_steps --epoch_count 1 --epoch_begin 0 --epoch_save $epoch_save \
--lr_init 2e-5 --lr_final 2e-5 --warmup_steps 0 --beta1 0.9 --beta2 0.99 --adam_eps 1e-8 \
--accelerator gpu --devices 1 --precision bf16 --strategy deepspeed_stage_1 --grad_cp 1 \
--my_testing "x070" \
--peft pissa --pissa_config $pissa_config \
# The following are optional
# --op cuda/fla/triton (choose different operators, default is cuda if this parameter is not added)
# --wandb RWKV-PEFT-LoRA (whether to use wandb to monitor the training process)
# --quant int8/nf4 (whether to quantize the training)
# --lr_schedule wsd (whether to enable cosine annealing to optimize the learning rate, default lr_schedule = cos_decay)
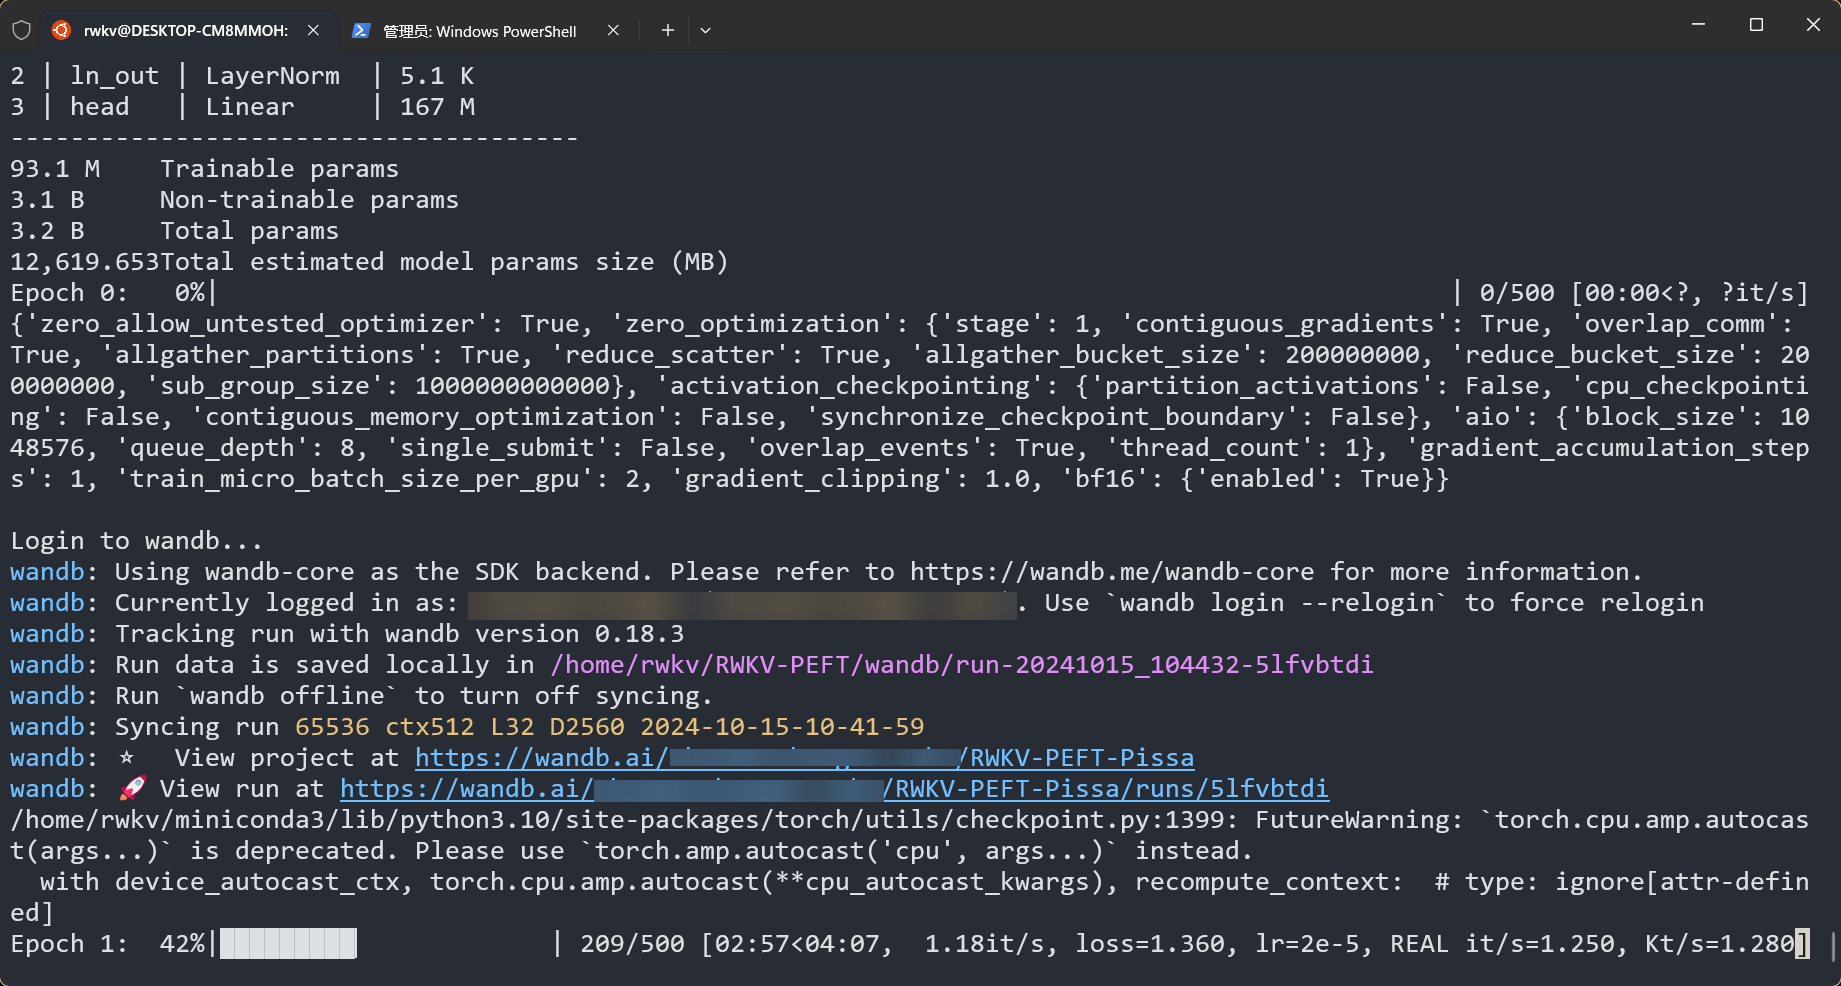
Start the Training
In the RWKV-PEFT directory, run the command sh scripts/run_pissa.sh to start the PiSSA fine-tuning.
After the training starts normally, it should be as follows:
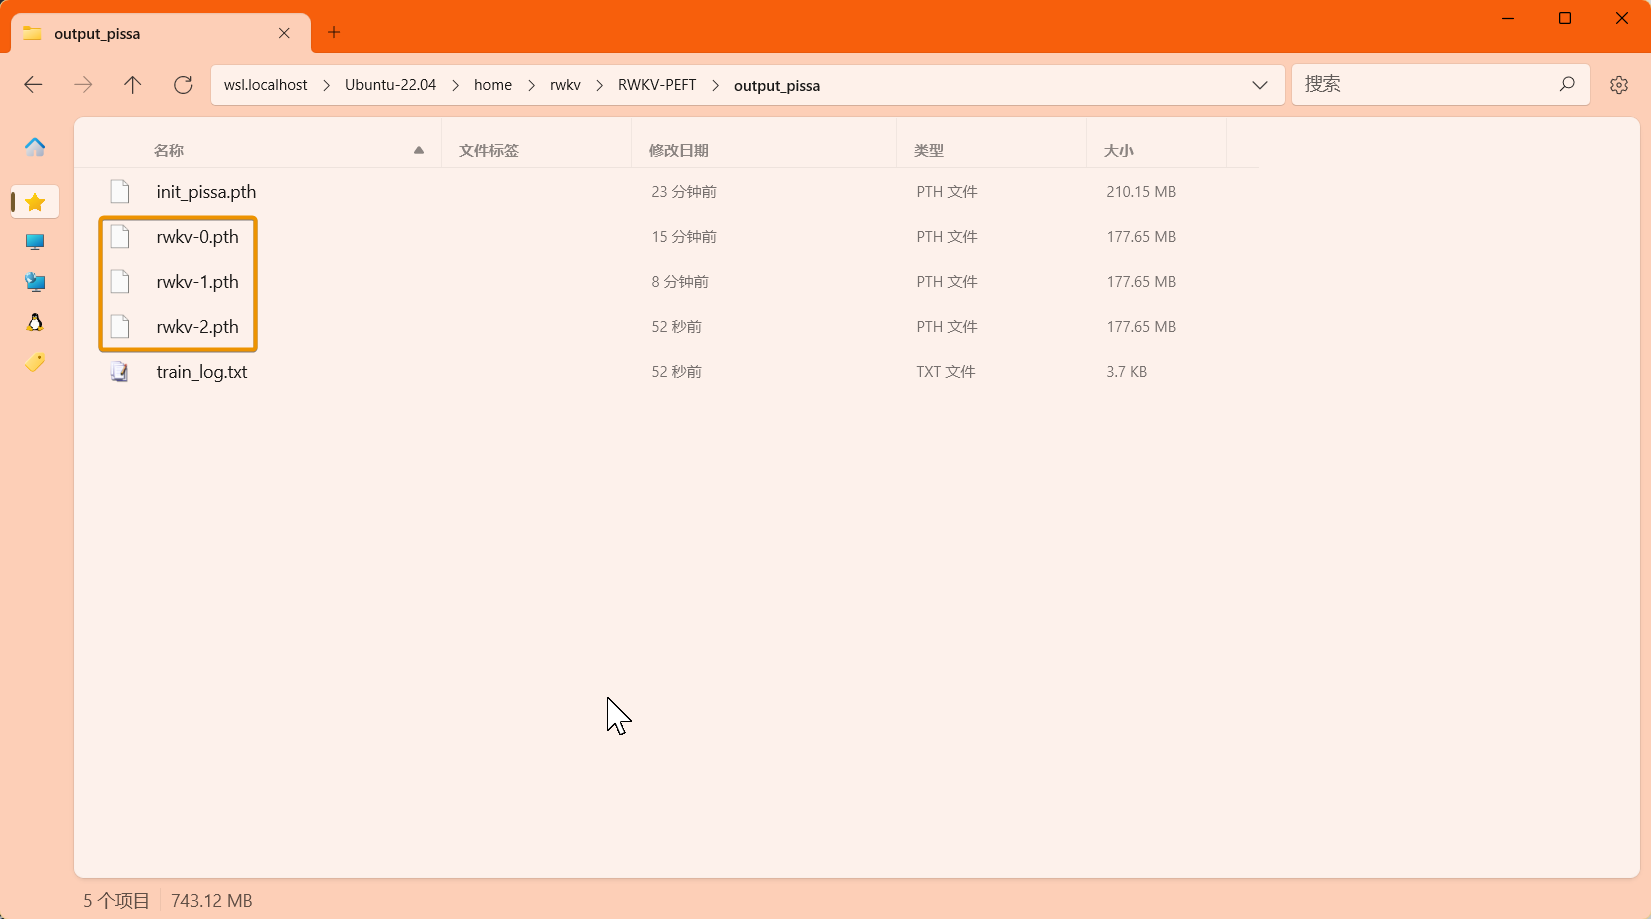
After the training is completed, you should be able to find the trained PiSSA weight file (in .pth format) and the training log (.txt file) in the output folder:
How to Use the PiSSA Weight File
After obtaining the PiSSA weight file, you need to merge it into the base RWKV model to obtain a complete PiSSA fine-tuned model.
The merging process can be completed using the merge_pissa.sh script file in the scripts directory.
Modify the Merging Parameters
Open the merge_pissa.sh script file in the scripts directory using a text editor and modify the merging parameters in the script:
| Parameter | Description |
|---|---|
| base_model | The path of the base RWKV model for PiSSA fine-tuning, referring to the load_model path in run_pissa.sh |
| pissa_checkpoint | The path of the trained pissa file, usually stored in the proj_dir directory specified in run_pissa.sh |
| pissa_init | Fill in the path of the pissa initialization weight file (init_pissa.pth), usually saved in the same directory as the trained pissa file |
| output | The output path of the merged PiSSA model (including the model naming xxx.pth) |
| TYPE='pissa' | The merging type: PiSSA. No need to modify |
| --quant | Follow the quantization parameter during training, "nf4" or "int8". If quantization was not used during training, there is no need to add this parameter |
Reference for the merging parameters:
base_model='/home/rwkv/models/basemodel/3b.pth'
pissa_init='/home/rwkv/RWKV-PEFT/output_pissa/init_pissa.pth'
pissa_checkpoint='/home/rwkv/RWKV-PEFT/output_pissa/rwkv-2.pth'
output='/home/rwkv/RWKV-PEFT/output_pissa/pissa-test-3b.pth'
TYPE='pissa'

python merge/merge.py --base_model $base_model \
--lora_init $pissa_init \
--lora_checkpoint $pissa_checkpoint \
--output $output \
--type $TYPE
# --quant int8/nf4 (Synchronize with the quantization parameter during training)
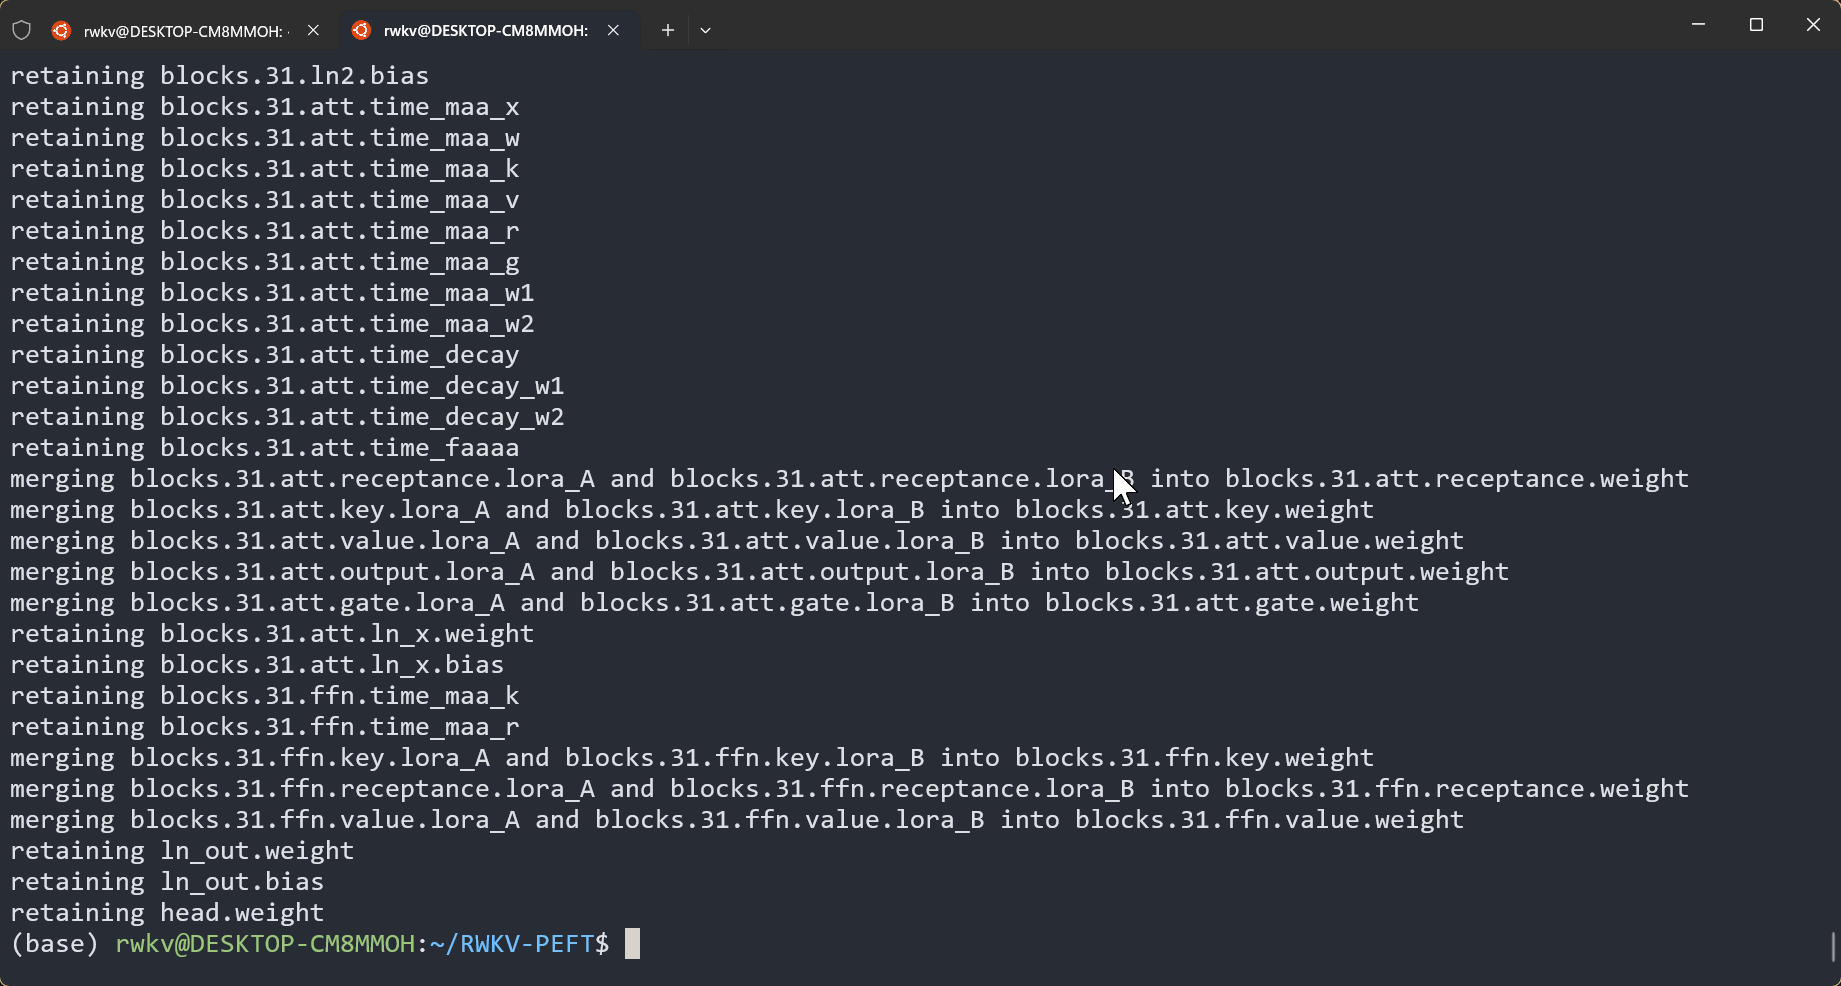
Merge the PiSSA Weight File
After modifying and saving the file, run the command sh scripts/merge_pissa.sh in the RWKV-PEFT main directory to merge the PiSSA weight file and the RWKV model into a complete PiSSA fine-tuned model:
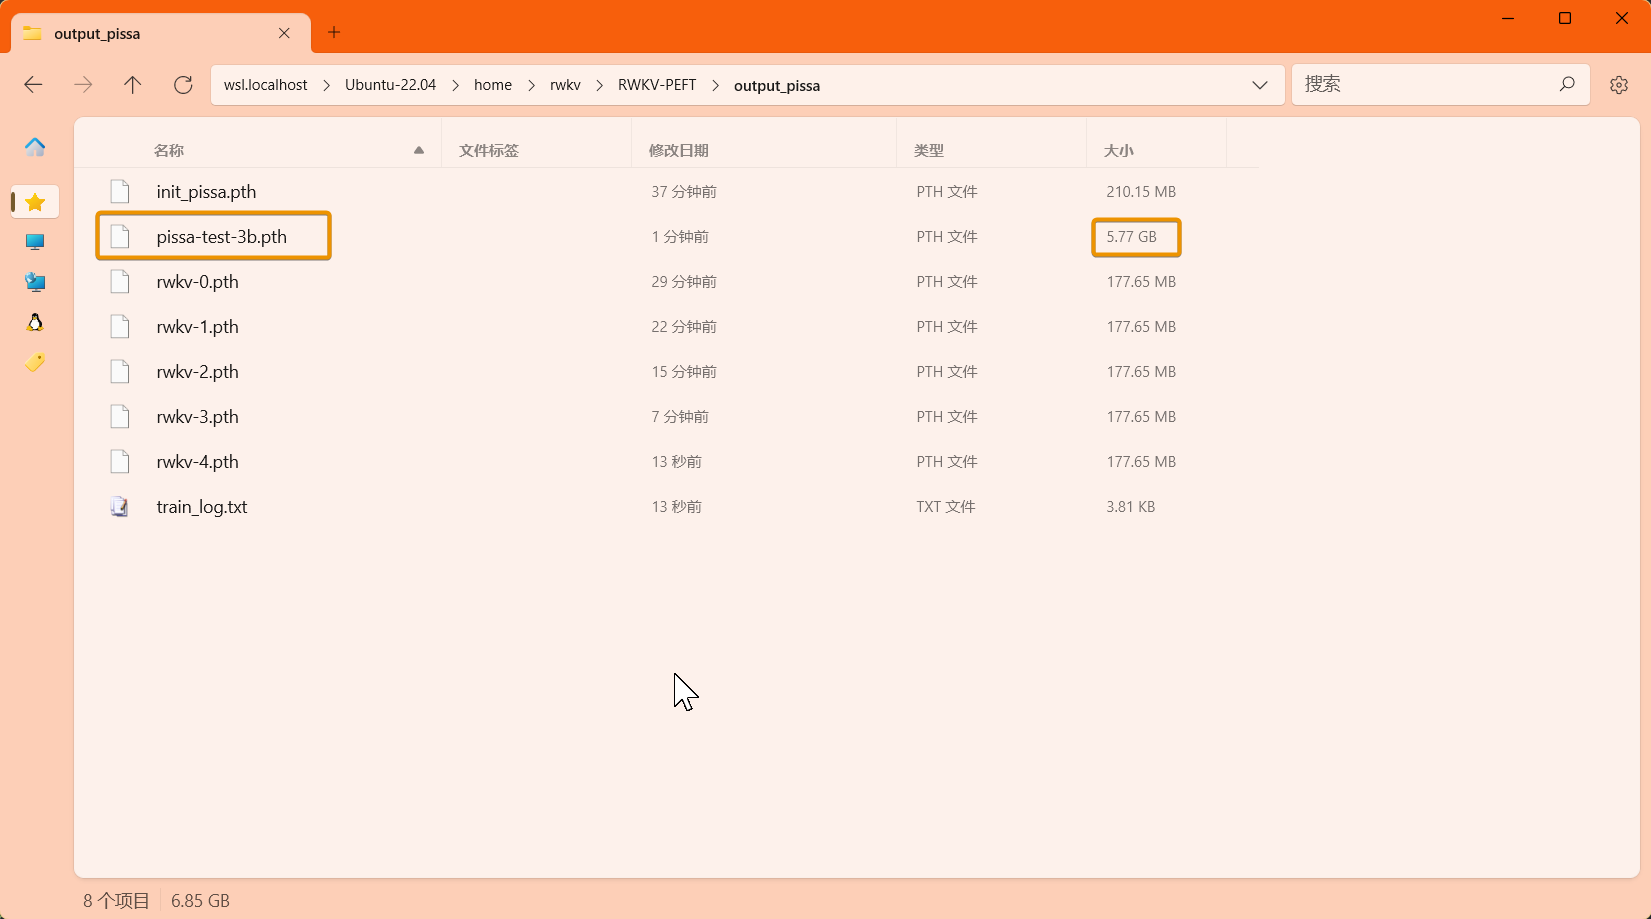
After the merging is completed, you can find the merged PiSSA fine-tuned model (in .pth format) in the output path:
The merged PiSSA fine-tuned model can be used normally in RWKV Runner or Ai00.

