
State Tuning Tutorial
What is State Fine-Tuning?
RWKV is a pure RNN, so it can do things that transformers find difficult. For example, as an RNN has a fixed-size state, fine-tuning the initial state of RWKV is equivalent to the most thorough prompt tuning and can even be used for alignment because of its strong transferability.
The State tuning method in this article comes from the RWKV community fine-tuning project RWKV-PEFT.
Before you start, make sure you have a Linux workspace and an NVIDIA graphics card that supports CUDA.
The VRAM requirements for State tuning can be referred to in the following table:
| Model Parameters | bf16 | int8 | nf4 |
|---|---|---|---|
| RWKV7-0.1B | 2.6GB GPU | 2.4GB GPU | 2.5GB GPU |
| RWKV7-0.4B | 3.1GB GPU | 2.9GB GPU | 2.8GB GPU |
| RWKV7-1.5B | 5.3GB GPU | 4.1GB GPU | 3.7GB GPU |
| RWKV7-2.9B | 8.2GB GPU | 5.7GB GPU | 4.7GB GPU |
| Model Parameters | bf16 | int8 | nf4 |
|---|---|---|---|
| RWKV6-1.6B | 5.8GB GPU | 4.5GB GPU | 3.9GB GPU |
| RWKV6-3B | 8.7GB GPU | 6.2GB GPU | 4.9GB GPU |
| RWKV6-7B | 17.8GB GPU | 11.9GB GPU | 8.5GB GPU |
The data in the above table is based on the following test parameters:
- ctxlen=1024
- micro_bsz=1
- strategy=deepspeed_stage_1
Organize the Training Data
Collect Training Data in jsonl Format
To fine-tune the RWKV model through state tuning, you need to collect data suitable for training RWKV (in jsonl format). For specific methods, you can refer to Preparing the Training Dataset.
Configure the Training Environment
Please refer to the RWKV Training Environment Configuration section to configure the training environment such as Conda.
Clone the Repository and Install Dependencies
In Linux or WSL, use the git command to clone the RWKV-PEFT repository:
git clone https://github.com/JL-er/RWKV-PEFT.git
After the cloning is completed, use the cd RWKV-PEFT command to enter the RWKV-PEFT directory. And run the following command to install the dependencies required by the project:
pip install -r requirements.txt
Modify the Training Parameters
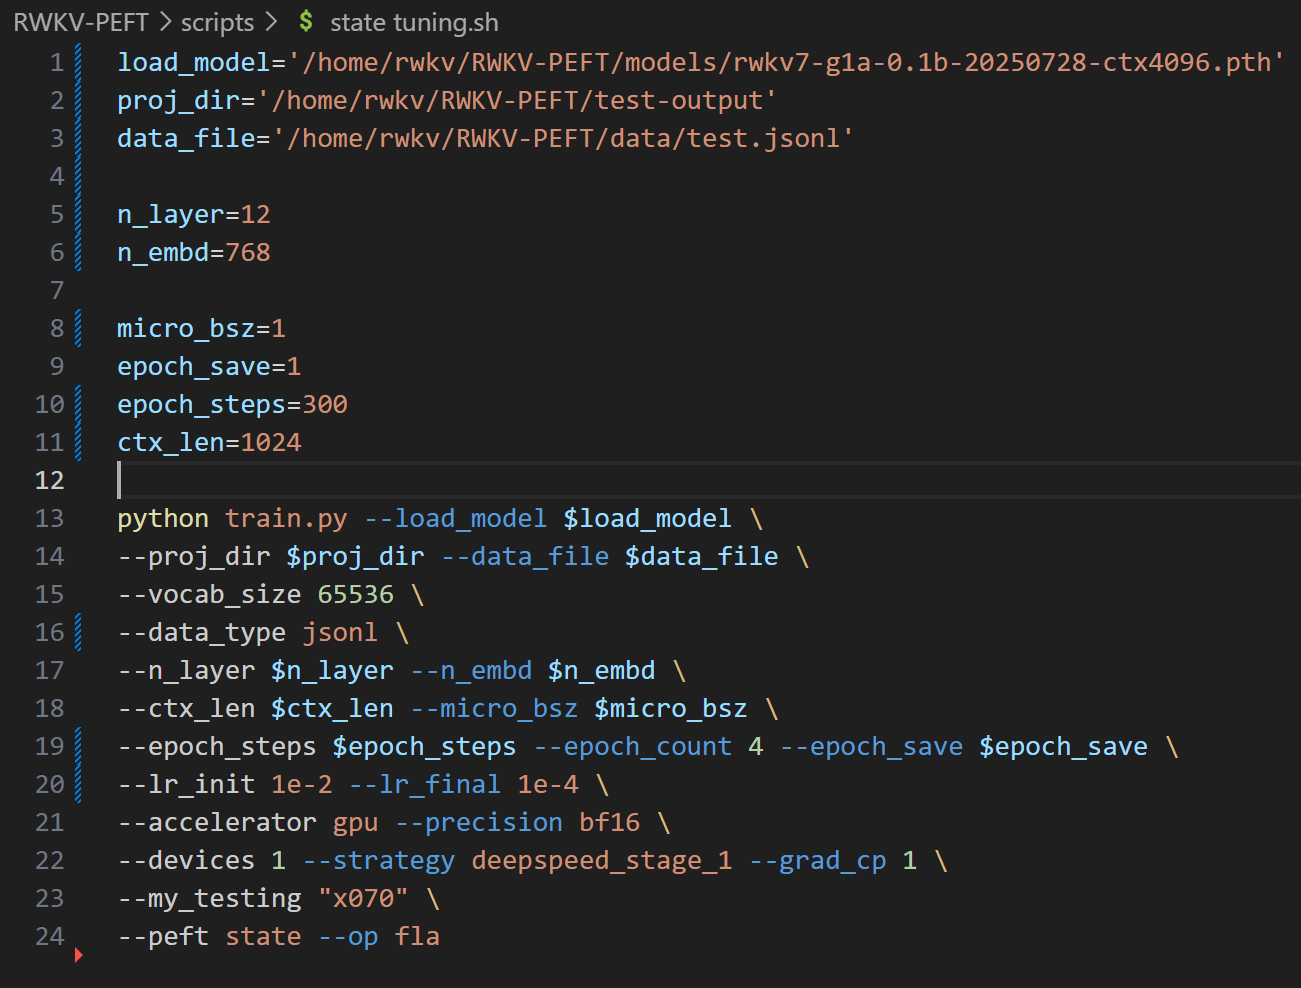
Open the state tuning.sh file in the RWKV-PEFT/scripts directory using any text editor (such as vscode), and modify the training parameters to control the fine-tuning training process and training effect:
The following is a state tuning parameter adjustment process:
Adjust the Path Parameters
The first three lines of the state tuning.sh file are file path parameters:
- load_model: The path of the base RWKV model
- proj_dir: The output path of the training log and the state file obtained from training
- data_file: The path of the training dataset. Note that there is no need to include the bin and idx suffixes in the path, only the file name is required.
Adjust the n_layer and n_embd Parameters
The parameter sizes of the base RWKV models are different, and the values of n_layer and n_embd used during training are also different. The following is the comparison list of the RWKV models with different parameters and the values of n_layer and n_embd:
| Model Size | n_layer | n_embd |
|---|---|---|
| 0.1B | 12 | 768 |
| 0.4B | 24 | 1024 |
| 1.5B | 24 | 2048 |
| 2.9B | 32 | 2560 |
| 7B | 32 | 4096 |
| 14B | 61 | 4096 |
Adjust the Important Training Parameters
Tips
The following parameters are recommended to be adjusted according to your fine-tuning data and device performance.
| Parameter | Description |
|---|---|
micro_bsz=1 | Micro-batch size. Adjust according to the size of the VRAM. Gradually increase it starting from 1 during fine-tuning |
epoch_save=1 | Save the State file every few training epochs |
epoch_steps=1000 | The number of steps in each training epoch. Increasing this value will lengthen the training time of a single epoch |
ctx_len=512 | The context length of the fine-tuned model. For state tuning, it is recommended to start with a short length, such as 512 |
Adjust Other Training Parameters
The following lists other modifiable training parameters in the script and the effects of their modification.
Tips
Note: When fine-tuning the state, it is recommended to set --lr_init 1e-2, --lr_final 1e-4, and as short a ctxlen as possible. (Yes, state tuning requires a very high learning rate.)
| Parameter | Description |
|---|---|
--data_type binidx | Training corpus file format. Supports: utf-8, utf-16le, numpy, binidx, dummy, uint16, sft, jsonl. Recommended: jsonl or binidx. |
--vocab_size 65536 | Vocabulary size. Default is 65536. Set to 0 for the model to automatically determine the size. |
--epoch_count 5 | Total number of training epochs. Adjust based on results. |
--pre_ffn 0 | Replaces the first attention layer with an FFN (Feed-Forward Network). Sometimes beneficial. |
--lr_init 1e-2 | Initial learning rate. Recommended 1e-2 for state tuning; for other fine-tuning, do not exceed 1e-4. |
--lr_final 1e-4 | Final learning rate. Recommended 1e-4 for state tuning; for other fine-tuning, do not exceed 1e-4. |
--accelerator gpu | Accelerator type. Currently primarily supports gpu; cpu is generally not supported for training. |
--devices 1 | Number of GPUs. Enter 1 for a single card, or the actual count for multi-GPU setups. |
--precision bf16 | Training precision. Default is bf16. Supports: fp32, tf32, fp16, bf16. |
--strategy deepspeed_stage_1 | Lightning training strategy. deepspeed_stage_1 is recommended for fine-tuning. |
--grad_cp 1 | Gradient checkpointing. 0: Faster training but higher VRAM usage. 1: Slower training but saves VRAM. |
--peft state | Fine-tuning type. Use state for state tuning. |
--my_testing "x070" | RWKV model version. Select x070 for v7, x060 for v6, and x052 for v5 (deprecated/not recommended). |
--op fla | Operator selection. State tuning only supports the fla operator. |
--wandb PEFT-State-tuning | Optional. Whether to use wandb for training logs/visualization. Requires a pre-configured wandb account. |
--lr_schedule wsd | Optional. Learning rate scheduler. Default is cos_decay. Supports: cos_decay, wsd. |
Tips
After adjusting the parameters, remember to save the state tuning.sh file.
Appendix: State Tuning Configuration Reference
load_model='/home/rwkv/RWKV-PEFT/models/rwkv7-g1a-0.1b-20250728-ctx4096.pth'
proj_dir='/home/rwkv/RWKV-PEFT/test-output'
data_file='/home/rwkv/RWKV-PEFT/data/test.jsonl'

n_layer=12
n_embd=768

micro_bsz=1
epoch_save=1
epoch_steps=300
ctx_len=1024

python train.py --load_model $load_model \
--proj_dir $proj_dir --data_file $data_file \
--vocab_size 65536 \
--data_type jsonl \
--n_layer $n_layer --n_embd $n_embd \
--ctx_len $ctx_len --micro_bsz $micro_bsz \
--epoch_steps $epoch_steps --epoch_count 4 --epoch_save $epoch_save \
--lr_init 1e-2 --lr_final 1e-4 \
--accelerator gpu --precision bf16 \
--devices 1 --strategy deepspeed_stage_1 --grad_cp 1 \
--my_testing "x070" \
--peft state --op fla
Start the Training
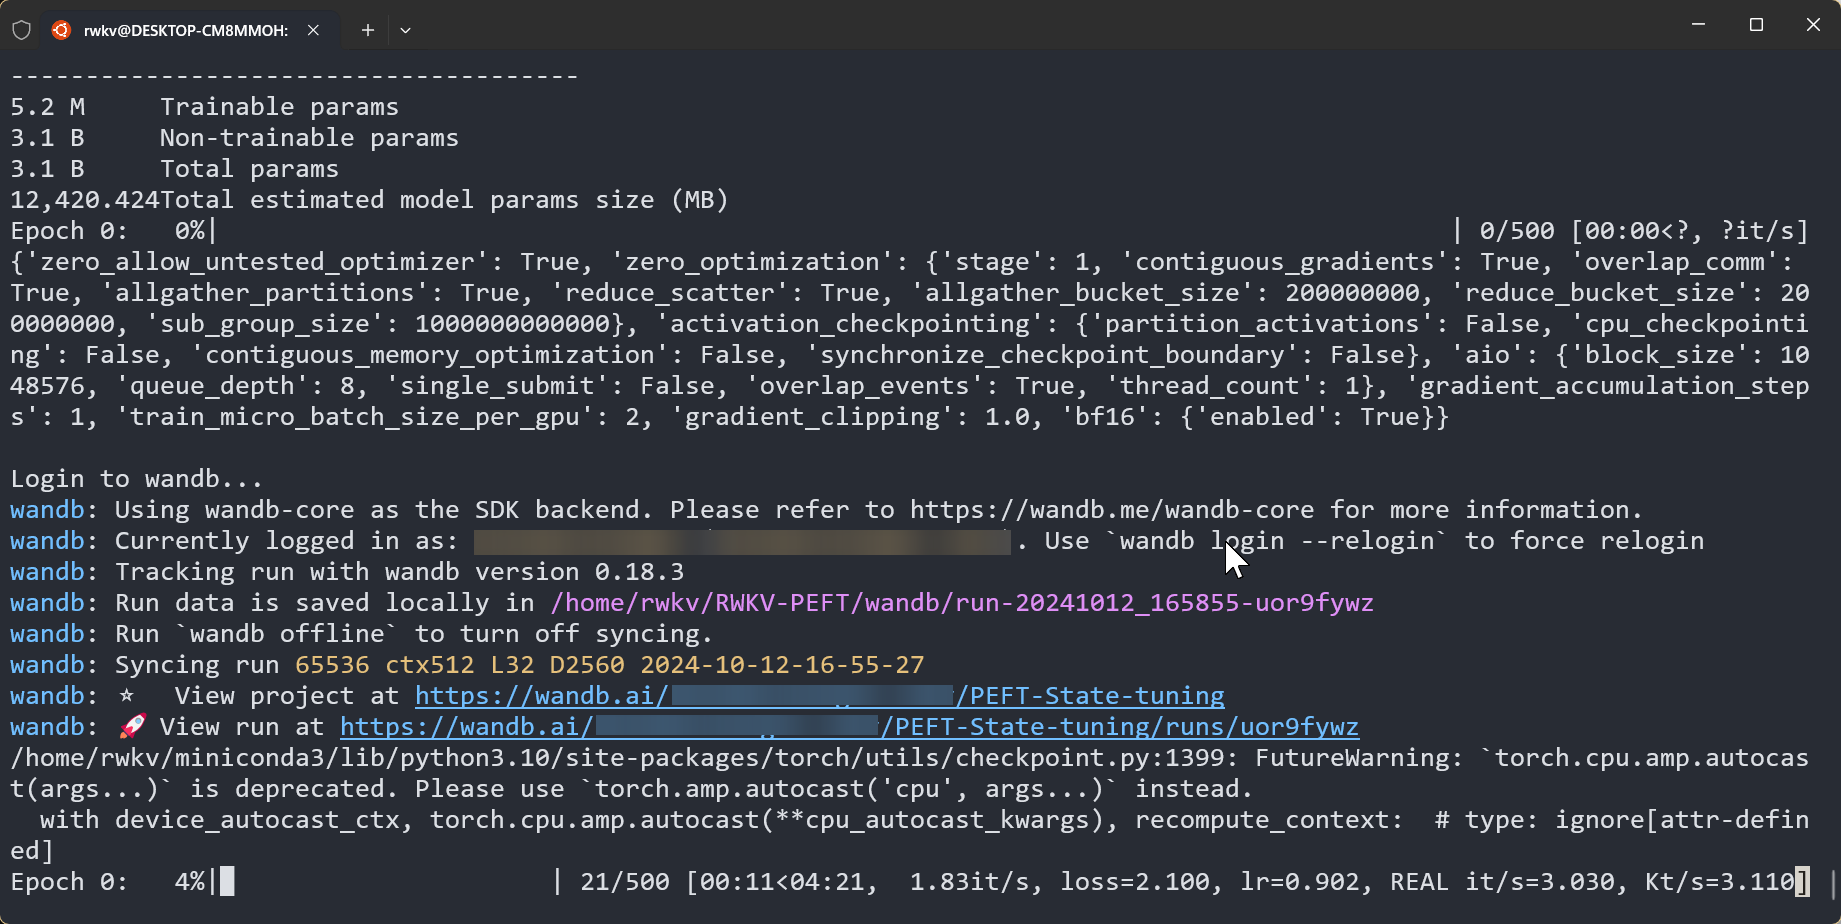
In the RWKV-PEFT directory, run the command sh scripts/state tuning.sh to start state tuning.
After the training starts normally, it should be as follows:
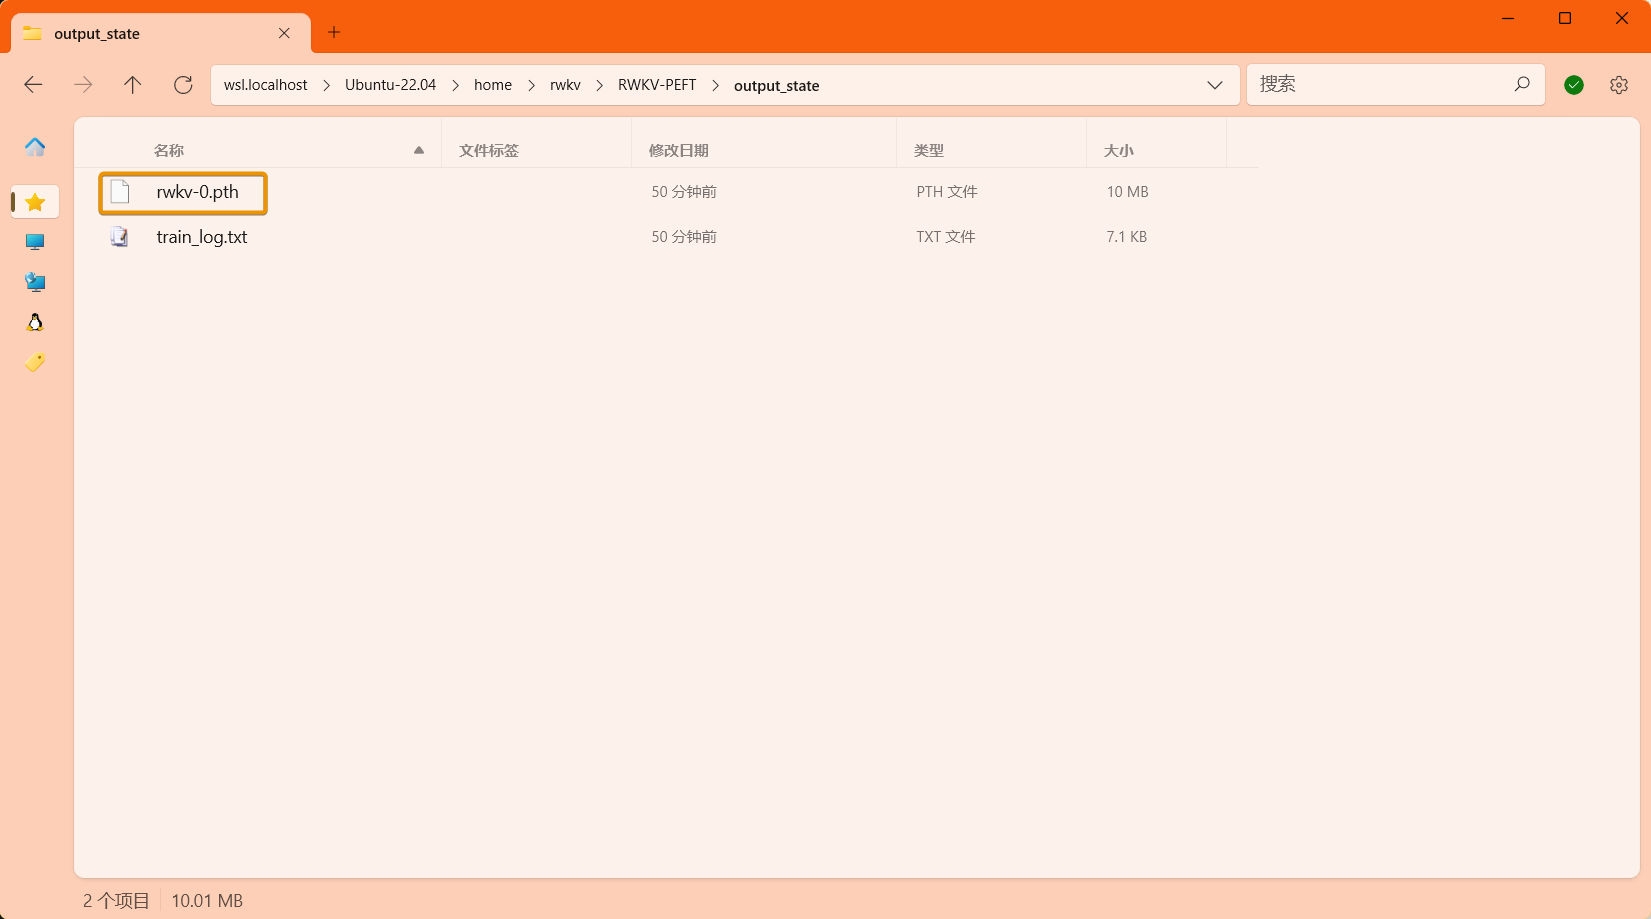
After the training is completed, you should be able to find the trained state file (in .pth format) and the training log (.txt file) in the output folder:
How to Use the State File
After obtaining the state file, you can use it as follows:
Use the
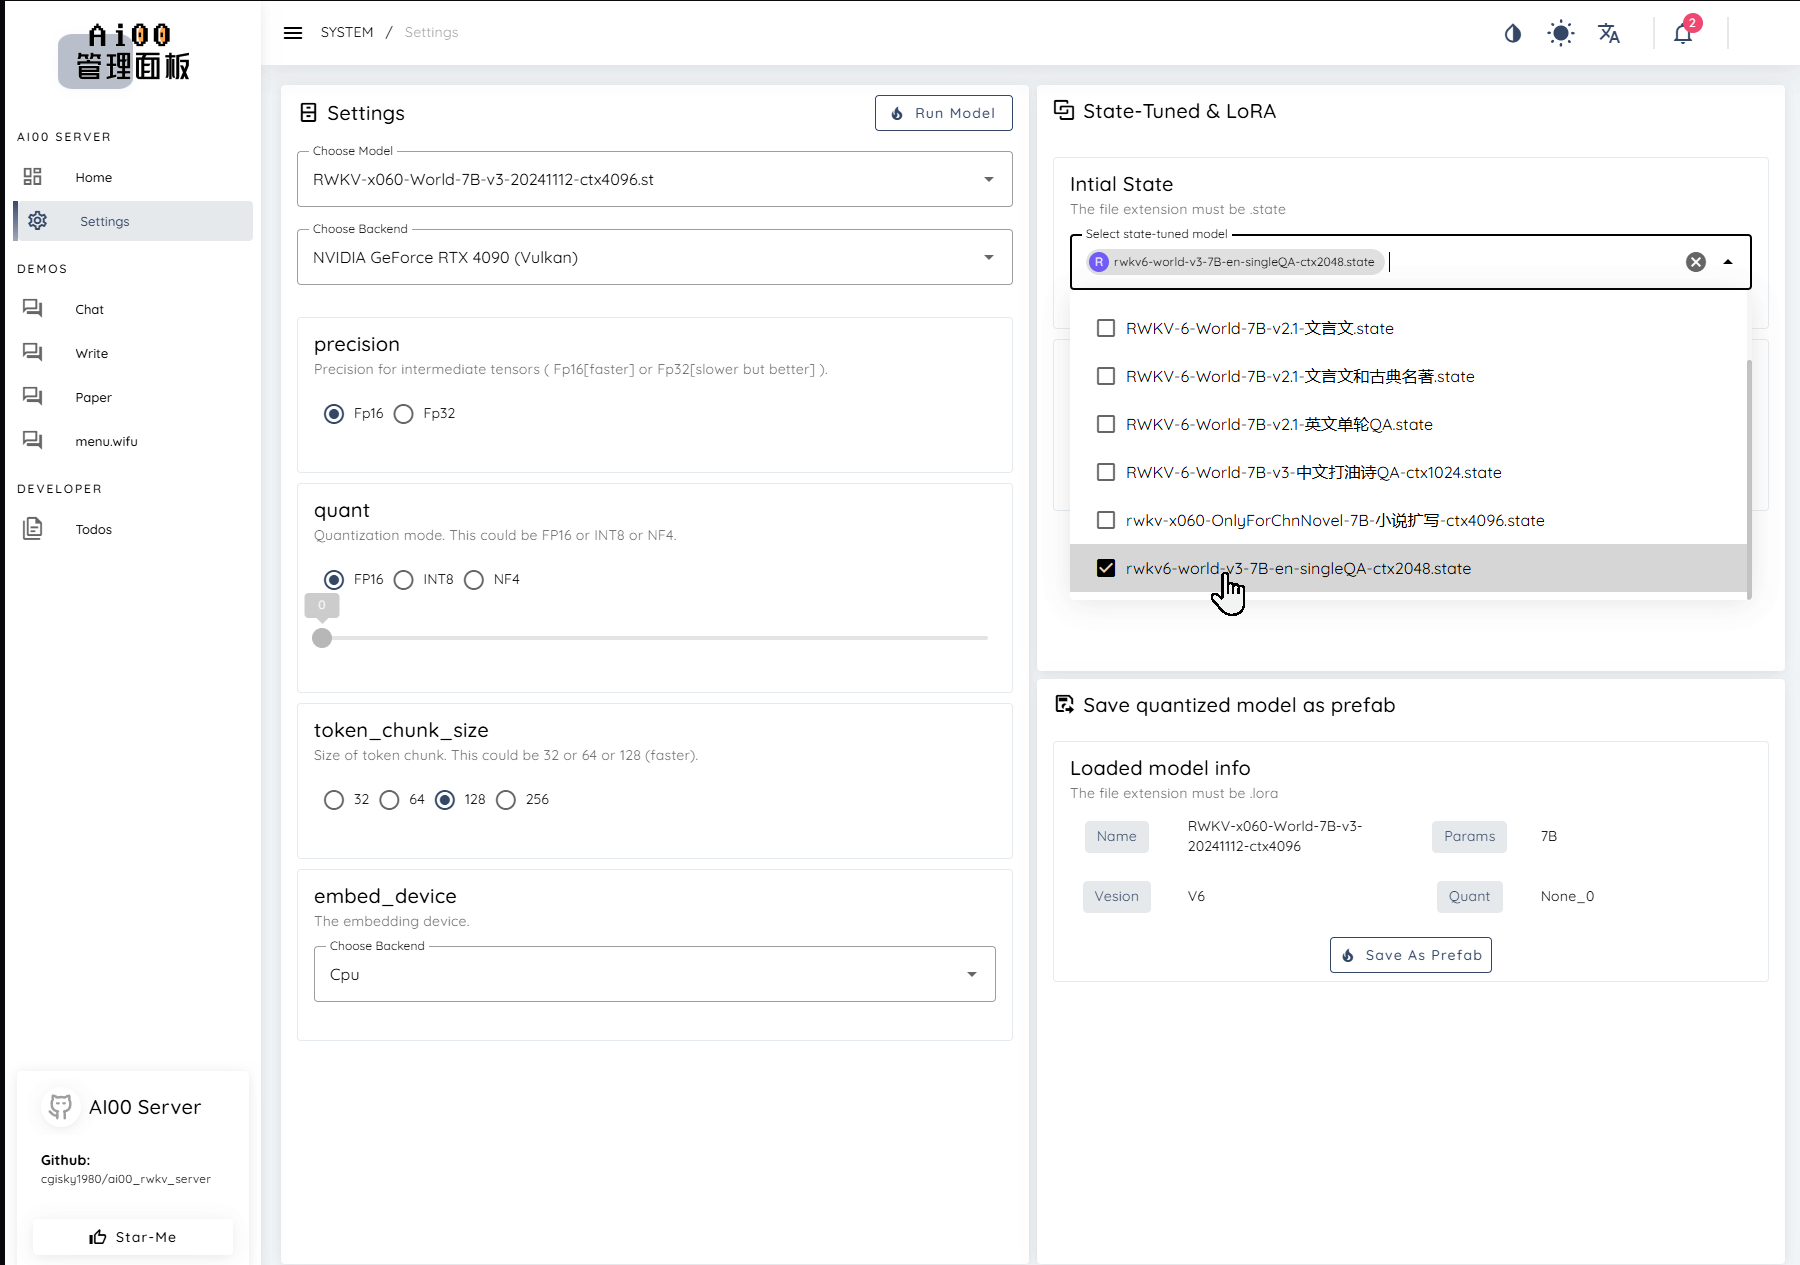
demo-state-merge.shtool to merge the state file into the base RWKV model to obtain a complete state fine-tuned model.You can choose to mount the state file separately in tools such as RWKV Runner or Ai00. (Recommended usage)
Tips
Note: When mounting the state file, you must use the same RWKV model as the one used to train this state file.
For example: This state file is fine-tuned based on the RWKV-6-World-3B-v3 model. Then, in tools such as RWKV Runner or Ai00, you must start the RWKV-6-World-3B-v3 model for the mounted state file to take effect.
Since our sample data is based on a large number of emojis and the ctx is very short, the effect of the trained State file is as follows:
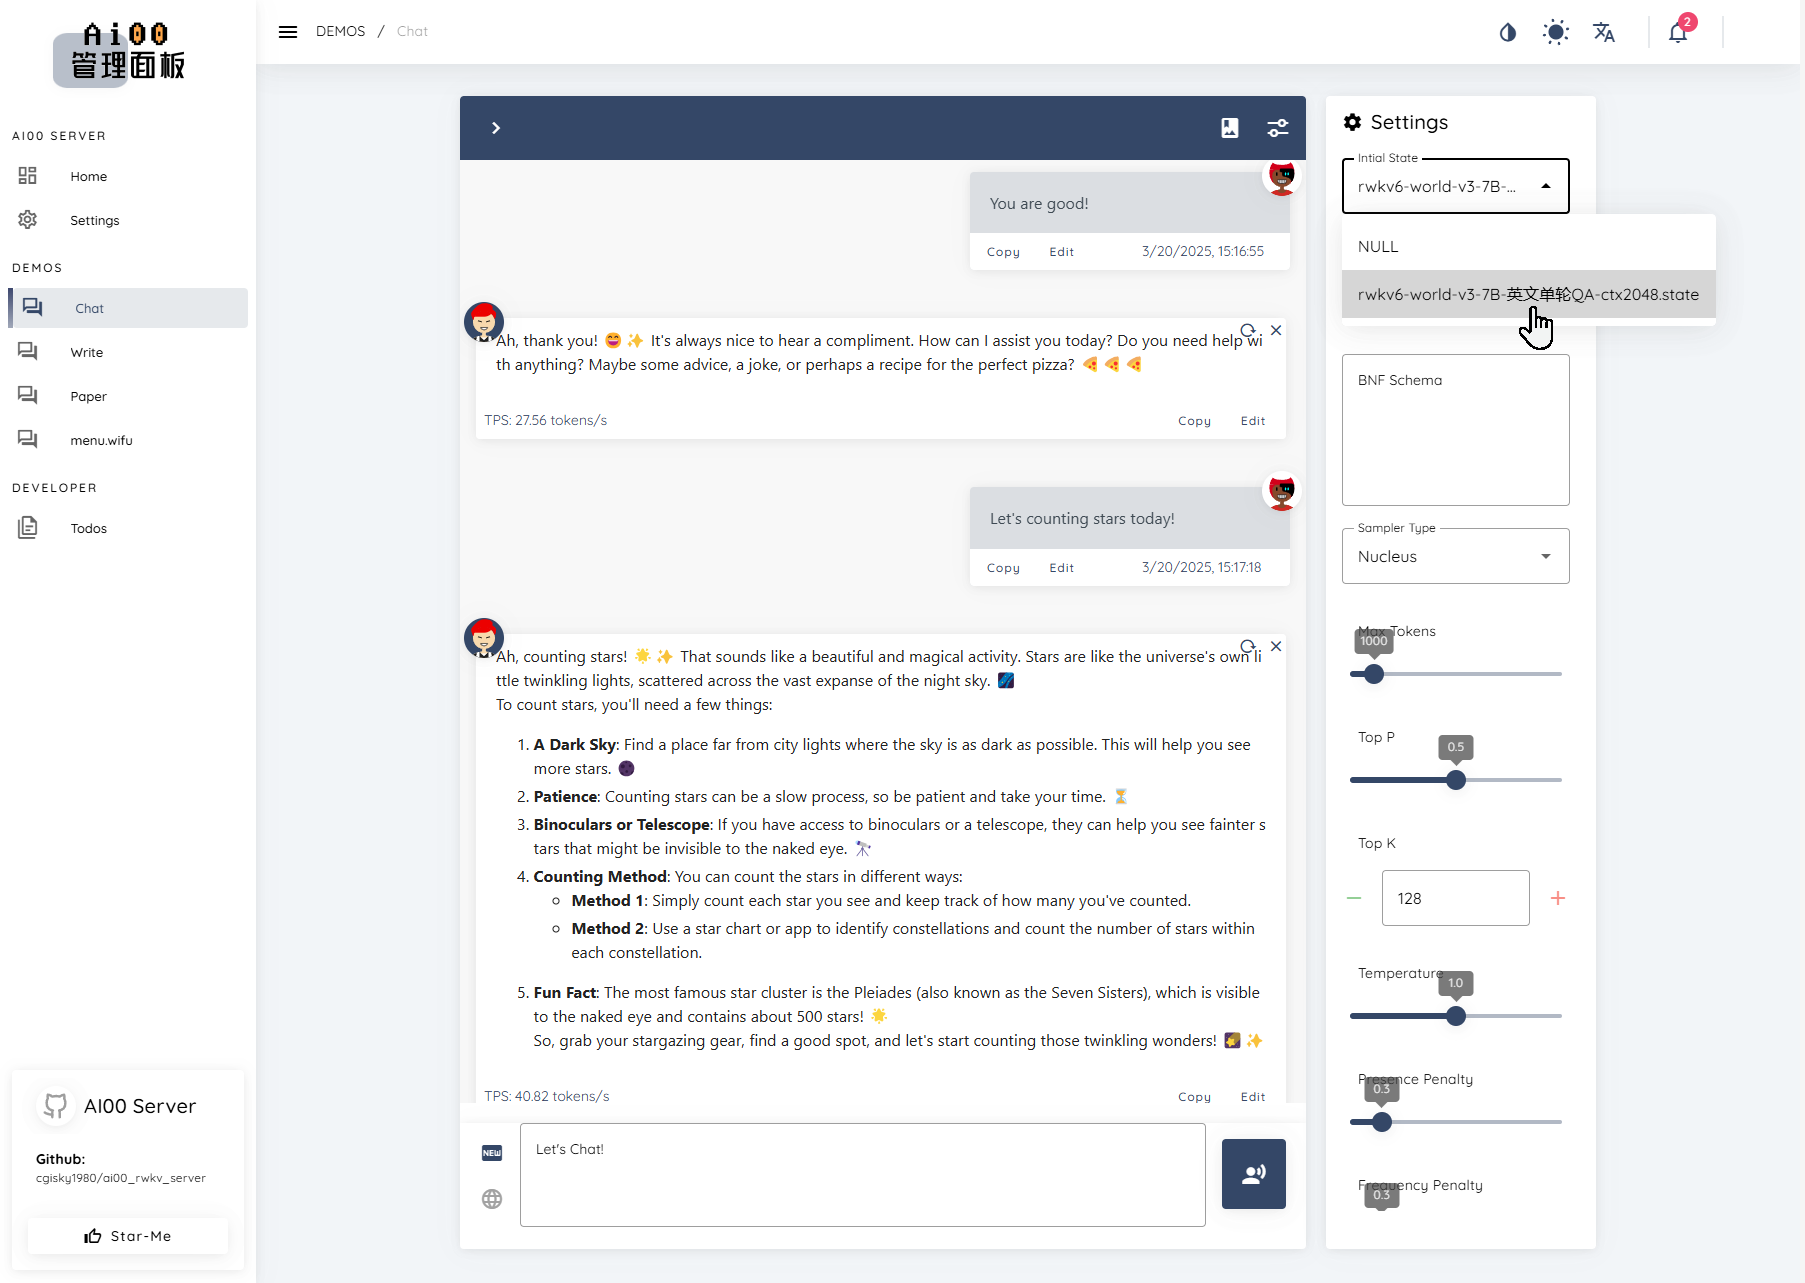
✨
Since the state file supports separate mounting, other users can also enhance the usage experience of the RWKV model by mounting the state file you trained.